This article is an oversimplified getting started for those who don’t know about Tomcat.
What is Tomcat
Apache Tomcat is a Java web server and servlet container that execute Java code to serve dynamic web applications.
- Web server: Delivers web content (like HTML and images) to the browser.
- Servlet container: Manage the execution of Java logic to handle requests and generate responses.
Hello World Tomcat Code
Let’s start with a very basic Tomcat webapp.
HelloWorldApp
├── WEB-INF
│   ├── classes
│   │   └── HelloWorld.java
│   └── web.xml
└── index.html- HelloWorldApp/: This is your application home.
- index.html: This is your static home page.
- WEB-INF/: You store your config and code here.
- web.xml: This tells Tomcat what class to run when the user visits a specific path.
- classes: You store your compiled code here.
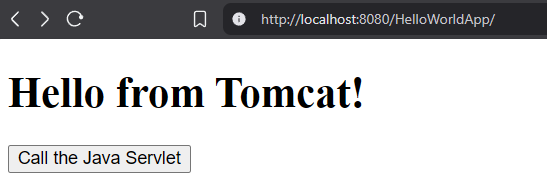
In short, when a user visits localhost:8080/HelloWorldApp, they will see index.html. If they click any buttons in index.html, web.xml will tell them what Java class to run.
index.html
<!DOCTYPE html>
<html>
<body>
    <h1>Hello from Tomcat!</h1>
    <form action="hello" method="GET">
        <input type="submit" value="Call the Java Servlet">
    </form>
</body>
</html>This is a basic HTML file. There is a form that once you click the button, it’ll send a GET request to /hello.
WEB-INF/classes/HelloWorld.java
import java.io.*;
import javax.servlet.*;
import javax.servlet.http.*;

public class HelloWorld extends HttpServlet {
    public void doGet(HttpServletRequest request, HttpServletResponse response)
    throws IOException, ServletException {
        response.setContentType("text/html");
        PrintWriter out = response.getWriter();
        out.println("<h1>This message was generated by Java!</h1>");
    }
}HelloWorld class, this class will print out a message when it receive a GET request.
WEB-INF/web.xml
<web-app>
    <servlet>
        <servlet-name>MyHelloServlet</servlet-name>
        <servlet-class>HelloWorld</servlet-class>
    </servlet>

    <servlet-mapping>
        <servlet-name>MyHelloServlet</servlet-name>
        <url-pattern>/hello</url-pattern>
    </servlet-mapping>
</web-app>This web.xml tells Tomcat to run the HelloWorld class when a user visits /hello.
Compile and build the package
Before we can deploy the code, we need to compile it. It’s also a best practice to deploy a Tomcat web application by packaging it into a WAR file.
A WAR (Web Application Resource) file is a standard Java format used to deploy a web application in Tomcat.
To keep things simple, we will compile and build the WAR file using a Tomcat JDK Docker container.
1. Make sure you’re in HelloWorldApp directory.
cd HelloWorldApp2. Run this docker command.
docker run --rm -v "$(pwd):/app" -w /app tomcat:9.0-jdk11-openjdk \sh -c "javac -cp '/usr/local/tomcat/lib/*' WEB-INF/classes/HelloWorld.java && \
jar -cvf HelloWorldApp.war index.html WEB-INF/classes/*.class WEB-INF/web.xml"-v "$(pwd): /app": Mount the current directory to the container/app.-w /app: Start the container on/app.javac -cp '/usr/local/tomcat/lib/*' WEB-INF/classes/HelloWorld.java: Compile .java into .class.jar -cvf HelloWorldApp.war index.html WEB-INF/classes/*.class WEB-INF/web.xml: Build a war file from the project.
This will give you HelloWorldApp.war.
Deploy with docker
We can deploy it using Docker.
docker run -p 8080:8080 --rm -v "$(pwd)/HelloWorldApp.war:/usr/local/tomcat/webapps/HelloWorldApp.war" tomcat:9.0-jdk11-openjdkAfter running the container, you can access Tomcat at localhost:8080/HelloWorldApp/.
When you click on the button, it’ll send a GET request to /hello. web.xml will tell Tomcat to run the HelloWorld class. The HelloWorld class will print out the message as below.
